Showing posts with label cooking - dinner. Show all posts

17 February 2011

Recipe - Chicken Wings with Momofuku Octo Vinaigrette

(recipe courtesy of David Chang via Steamy Kitchen)

This is the recipe title that proves my husband is a twelve-year-old :P.


Sauce

2 tablespoons finely choopped garlic
2 tablespoons chopped, peeled fresh ginger
1/4 teaspoon finely chopped fresh chili pepper*

1/4 cup rice wine vinegar
1/4 cup light soy sauce
1 1/2 tablespoons sugar
2 tablespoons canola, vegetable, or grapeseed oil**
Freshly ground black pepper**


*A word about the peppers.  Per the recipe, you can use any type of chili pepper you want from jalapeno to serrano to the Thai brid's eye chili.  If you don't like your food particularly spicy, just remember to split the pepper in half and remove the ribs and seeds.  The easiest way I've found to do that is to use a spoon to scrape them out.  Just remember to either wear gloves while doing this or else wash your hands directly afterwards and do NOT touch your face or eyes.  The pain level is about on par with touching your eyes with Ben-Gay residue on your hands.

Don't ask how I know that.  Just go with it...

**not pictured.

Chicken

3 lbs chicken wings or drumettes

Preheat the oven to 425F.  Line a baking pan with parchment paper or spray the pan with cooking spray.  Place the chicken on the pan in a single layer.  Bake for 20-25 minutes, turning the wings or drumettes over halfway through the cooking process.

While the chicken is baking, make the vinaigrette.  Combine the ingredients in a bowl large enough to fit all of the chicken. 

When the chicken is finished, toss the wings or drumettes in the vinaigrette to coat.

This was pretty good.  The vinaigrette itself has some tart and sweet flavors and the ginger comes through quite nicely as well.  I didn't have too much spice without the ribs and seeds of the peppers which I tend to cut down on as a general rule since the SU has this thing about seeing through time (thank you, Simpsons) due to the heat quotient of foods thanks to his gastric bypass.  The recipe does suggest adding cilantro which I did, and that upped the heat nicely without taking it into awe-inspiring levels.

The only thing I did differently than the recipe was I tossed the drumettes in the vinaigrette and then put them back in the oven for a few minutes for the sauce to cook slightly and the sugars to carmelize just a bit.  Then I took them out and tossed them in the remaining vinaigrette once more.

Final product:


25 January 2011

Recipe - Pizza Dough

I love to cook.  My favorite foods to cook and eat are probably Thai first and Filipino second.  I'm from SoCal originally and I'm still looking for a good lumpia recipe to deal with the lack of lumpia where I now live (holy cow, I miss the lumpia!).

Yeast-based foods that need to rise have been my nemesis on occasion.  And please do not ask about pie crusts.  The first rule of Pie Crusts is do not talk about the Pie Crusts.  I  know I could buy pre-baked shells but it's the principle of the thing.  The Spousal Unit loves lemon meringue pie and, as God is my witness - and apparently Scarlett O'Hara too - I am going to make one from scratch.  Someday.

Ahem.  Anyway, I saw this recipe on Food Network and thought, "Oh heck, even I can't screw that up."  I tried it and, ergo! Voila!  Viola!  Presto Magnifico!  I created pizza dough that actually worked!  And worked again!  (I realize this is a lot of exclamation points but y'all really have no idea :)).

Pizza Dough (via Food Network courtesy Giada DeLaurentiis)

The Players:

5 cups all purpose flour
1 (1/4 oz) packet active dry yeast
1 1/2 teaspoons kosher salt
1 1/2 cups warm water @ 100-110 degrees
Olive oil, for drizzling


Put the water in a small bowl.  Add the yeast and stir until dissolved.

In a large bowl, whisk the flour and salt together.  Add the yeast mixture and stir until a soft dough forms.  If the dough is too dry, add a little extra water, one tablespoon at a time.  If the dough is too sticky, add extra flour, one tablespoon at a time.  Transfer the dough to a floured work surface.  (This part took me once or twice to get the "feel" of the dough that told me I had enough of a water to flour ratio. What I found was if my palms felt like they were slightly sweaty then the dough was generally moist and elastic enough.)


With floured hands, knead the dough until it becomes smooth and elastic, about 10 to 12 minutes.  This is the fun part 'cause you're gonna need some arm muscles:


Not necessarily like those (that's me on the left and, boy, do I miss those arms) but you do want to bear down on the dough and use the heels of your hands to fold and knead the dough rather than your fingers.  As you do, you'll notice it become much smoother and more pliable although it may still be slightly sticky.

After you've finished kneading the dough, drizzle the inside of a clean bowl with olive oil.  Put the dough in the bowl and cover loosely with plastic wrap or a damp kitchen towel.  Set the bowl in a warm, draft-free place, until the dough has doubled in size, about 2 hours.

Using a fist, deflate the dough in the center and cut it
into three equal-sized pieces.  Form the dough into three balls and put into three oiled bowls.  Cover each bowl loosely with plastic wrap or a damp kitchen towel and let rest for one hour.  Remove the dough and wrap in plastic.  Refrigerate for up to one day.

Whatever portion I'm using within the next 24-48 hours I will just leave in the fridge in a plastic Baggie.  The rest I will put in the freezer until I'm ready to use it and it freezes very well.  The dough makes a very good thin crust pizza.  I usually add my sauce and whatever toppings I want and then cook it at 350-375 to the degree of doneness I prefer.  Is yummy :).

09 January 2011

Marsala Beef

Since a couple people mentioned that beef, garlic and Marsala sounded like a good thing, I figured I would share the recipe. Unfortunately, I didn't take pictures all through this (*makes notes for next time*) but here is the basic premise. Adjust amounts up or down as you need. The Spousal Unit and I are saving pennies so I will usually buy things like cuts of meat in a slightly larger quantity. It guarantees we have leftovers for the next day's work lunch and generally means we have some left that we can freeze for another night as well when it's just not quiiiiiite payday yet :).

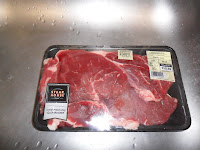
2 lbs beef (I used a thick cut top sirloin since that's what Walmart had on sale)
4 cloves garlic
1/2 cup olive oil
4 tablespoons flour
4 tablespoons butter
1/3rd cup Marsala + 1 or 2 "splashes"
1 can beef broth

Salt
Pepper


Cut beef into thin strips while still partially frozen. Set aside.

Peel garlic and slice. Pour olive oil into a small saucepan and add garlic. Place onto stove top on low heat. The olive oil will warm and slowly cook the garlic. You will know it is done when you can smell the garlic and it is a toasty brown color. Strain the oil or remove the garlic with a slotted spoon.

Heat a large saute pan with the garlic-infused oil and add the meat, then season with salt and pepper. Cook until just pink in the middle/rare. Remove from the pan and set aside, draining any oil left. Adjust the heat to low. Add the butter and flour to the pan, whisking to create a roux. Cook until the roux is a golden brown color and then add the marsala to the pan. Once it is incorporated into the roux, slowly add the beef broth a little at a time, whisking to avoid lumps. Let the gravy simmer for a few seconds in between each addition of broth in order for it to thicken. Stop when the gravy is to your liking. Add a splash or two more of Marsala if you desire. Add salt and pepper to taste.

Return the meat to the pan and warm through.

We ate this over rice but I think it would be equally good in sub rolls or over egg noodles or diced, roasted potatoes as well.

09 July 2009

Chicken Chimichangas, Part II: The Filling

So, to briefly recap...first we made the tortillas (which turned out wonderfully) and now we're on to the filling for the chimichangas. This recipe also had the option of adding refried beans to the chimichanga by spreading them on the tortilla before adding the chicken mixture but I chose to forgo that step.

1 small onion, chopped
2 1/2 cup chopped cooked chicken


1 tbsp oil
1 1/2 tsp chili powder
1/2 tsp cinnamon
3 cloves garlic, minced
2 cups salsa
1/2 tsp cumin
1 pinch salt


1. Saute onion and garlic in oil. Stirl in salsa, spices, chicken and salt. Cook until heated through.


2. If using, spread about 2 tbsp of refried beans on each tortilla then add about 1/2 cup of the chicken mixture. Fold like a burrito and secure with a toothpick or metal skewer.


3. Spray all sides with cooking spray and bake at 400F for 20 minutes (until golden brown) OR fry in a small amount of olive oil until brown on both sides.


4. EAT!


OK, first? Yum. Realllly good eats :).

As far as the folding went, I found it worked best if I laid the chicken filling down a line in the middle like the picture above, leaving some room around the edges. I took the top part of the tortilla and folded it over the chicken like I was starting to roll a cigar. Then, I folded the sides in towards the middle to create the beginnings of a tube shape. Then I folded the "tube" over.

(And how many times can I say "folded" in one paragrah?)

I didn't really need the toothpicks or any kind of skewer. As long as the tortillas aren't overstuffed, the mixture won't come out the sides or anything like that and the edges all meet, so there is a solid seam all the way around the chimichanga. I also chose to bake them in the oven rather than deep frying them; personal preference :).

The cinnamon may sound kind of odd but go with it. It will smell almost sweet - like baking sweet - when you're heating the chimichanga filling or they are cooking in the oven. When you're eating them, the spice translates into heat more than sweet. It adds another layer to whatever salsa you may have used and feels warm on the back of your tongue.

These were very tasty and kept well over the two-three days we ate them as leftovers.

03 July 2009

Chicken Chimichangas, Part I: Homemade Tortillas

I love Mexican food - the more authentic the better. It's sommetimes hard to find the good stuff but we've managed to scope out some of the more "local" joints versus the ones that serve more Americanized versions of Mexican food. In between, I work on increasing my own repetoire. Something I hadn't really tried to this point was tortillas. For some reason, the making of them reminds me of my one true nemesis of the cooking world - pie crust. I cannot make a decent pie crust to save my life. I think tortillas seem similar because there is resting and rolling and such involved - similar to pie crust. But then I saw this recipe and the idea of tortilla-making suddenly seemed, well, simple. The only real difference I found was the use of shortening versus lard.

Flour Tortillas (makes eight 10" tortillas)

2 cups flour
1/4 cup shortening
1/2 tsp salt
1/2 tsp baking powder
1/2 to 3/4 cup warm water


1. Whisk together the flour, salt and baking powder.

2. Cut in the shortening until mixture resembles course meal.

3. Add warm water a little at a time, until mixture forms a soft dough without being sticky.

**Here is where you want to be careful. Don't just pour water in thinking all that flour will absorb it. Keep adding slowly and then knead the forming dough until all the water is absorbed before adding more. It's kind of like making risotto. As the liquid is absorbed, you add more. Same idea here. If you do add a little too much, keep working the dough gently. It may seem a little sticky at first but it will largely disappear with some patient kneading.

4. Knead until smooth and elastic. Roll into 8 equal size balls and cover with plastic wrap. Let rest for 30 minutes.


5. Roll each ball out on a lightly floured surface until very thin and about 10" in diameter. Layer them between sheets of plastic wrap and let rest for 10-15 more minutes (or until you are ready to cook them).


6. Place in a dry (no oil please) non-stick frying pan over med-high heat for about 1 minute on each side. You know its read to flip when it starts to puff up a bit.

7. Wrap with a tea towel while you are cooking the rest, so they don't dry out. Serve warm.


These were wonderful. They were pliable enough to roll into chimichangas with a nice, chewy texture. They also were good as soft tacos or just warm out of the pan with some butter or some butter/cinnamon sugar.

But since we're talking about chimichangas here, we'll get to that part next :).

28 June 2009

Italian Casserole

I made this on one of those nights when I came home and wondered exactly what the heck I was going to do for dinner. It's not haute cuisine (or hottie cwi-zee-nee as my husband likes to pronounce it), but it's tasty and can be ready fairly quickly with minimal ingredients and minimal mess.

The evening's guests of honor:


It's one pound of regular sausage, a box of pasta, a 32 oz can of crushed tomatoes and a 2 cup size bag of cheese. I like buying the sausage "plain" as it were and adding my own spices to control both the flavor and the heat rather than buying the "Italian" sausage links. The pasta is whatever will hold the sauce so I will usually go for radiatore or something with ridges, and the cheese is just whatever grabs me. Mostly it's mozzarella or a mix of mozarella and parmesan, but I have made a Mexican version of this with sharp cheddar and sharp cheddar/queso fresco.

Brown the sausage in a pan and add whatever spices follow along with the theme. If I'm making an Italian version, I'll usually throw in some salt, pepper, oregano, and just a touch of cayenne for some added heat. I just season to taste and the heat level my family is comfortable with. If I'm making a Mexican version, I will usually throw in some cumin and some chili powder as well; again, tasting as I go to make sure that nobody will (as Lisa Simpson says) "see through time".


As the sausage is cooking, I also get my pasta water started and my pasta cooking. Once the sausage is all cooked and the spices have been added, open up the can of crushed tomatoes and pour them in. I will sometimes add a few teaspoons of sugar to this to cut the acidity of the tomatoes (the Spousal Unit doesn't do so well with that sometimes). Stir to combine and let heat through. Mmmmmm...


By this time, the pasta should be ready. Go ahead and drain it and either dump it into a bowl or into a 13x9x2 casserole dish already sprayed with Pam. Add the meat/sauce mixture and stir to combine. Now comes my favorite part. Break out the cheese!


Put it in the oven at 375 degrees for about 20 minutes or so - give or take on whether you like your cheese melty or more brown and crispy on the top with meltiness on the inside. And...voila! Dinner.


The SU instantly liked this and has requested it nearly weekly ever since. He prefers the Italian over the Mexican but I like both. I've also played with adding veggies to it such as crimini mushrooms or zucchini that I've cubed or cut into small matchsticks. I'll cook the sausage first and then saute the vegetables in the drippings left over before adding the sausage back and then the crushed tomatoes. It adds more "good" filler to the casserole and I can cut down on the pasta used. I've also used ground turkey, but if I do, I try to get at least the 85/15 version so it's not quite so dry as the 90/10 can be.

Plus, you know, there's cheese. You can never go wrong with cheese :).